

Well you have now...
I decided to make my own head out of chocolate. Why? Just because I can... Newer iPhones have great face scanning tech, so why not put it to good use? I used the Bellus 3D face Scan to do this.
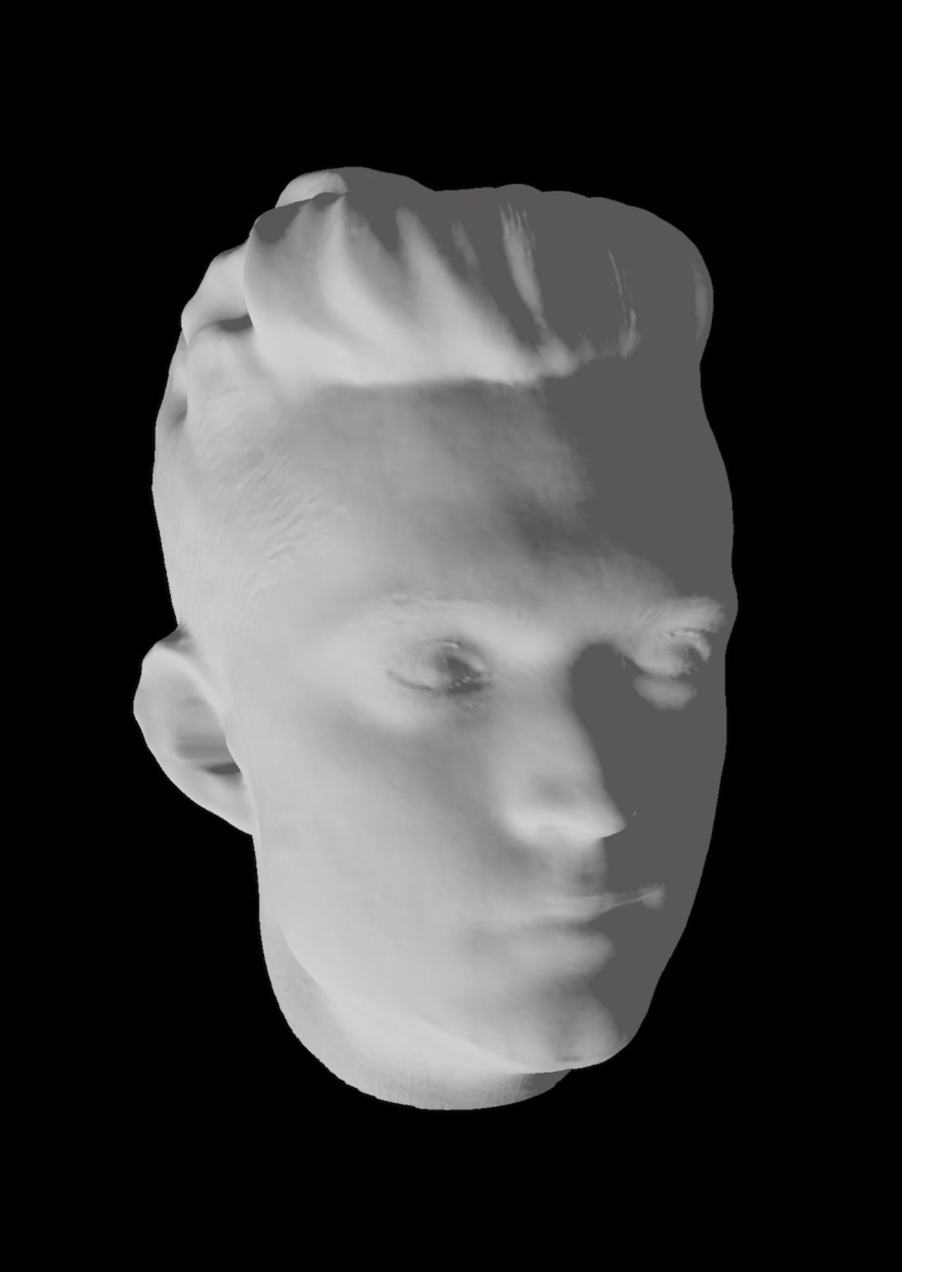
Access to the face depth camera on an iPhone created a remarkably accurate likeness, and the algorithms used by Bellus helped to round it out and create a full head. Once exported to an obj file (small fee) - you can easily open up the file in blender. Here I chose to manually sculpt a few features I felt were a bit skewed, like my ears and the tip of my nose. I also gave myself some small pupil indents to add a bit of depth to my eyes for a single colour and material.
Next Step, 3D print.
The output was a mesh surface of my face rather than a 3D model. Luckily Blender is amazing and free to use, and has all the tools we could ever need, and we can quickly convert the mesh to a solid object, and export as an stl.
Once we have it as an stl, any 3D slicer program that works with your printer can slice it up and prepare it for printing. There are also companies that will print stl files for you and post you the final item!

I printed my head in several different scalings for different size projects. Here's one about 10% size.
Mold it!
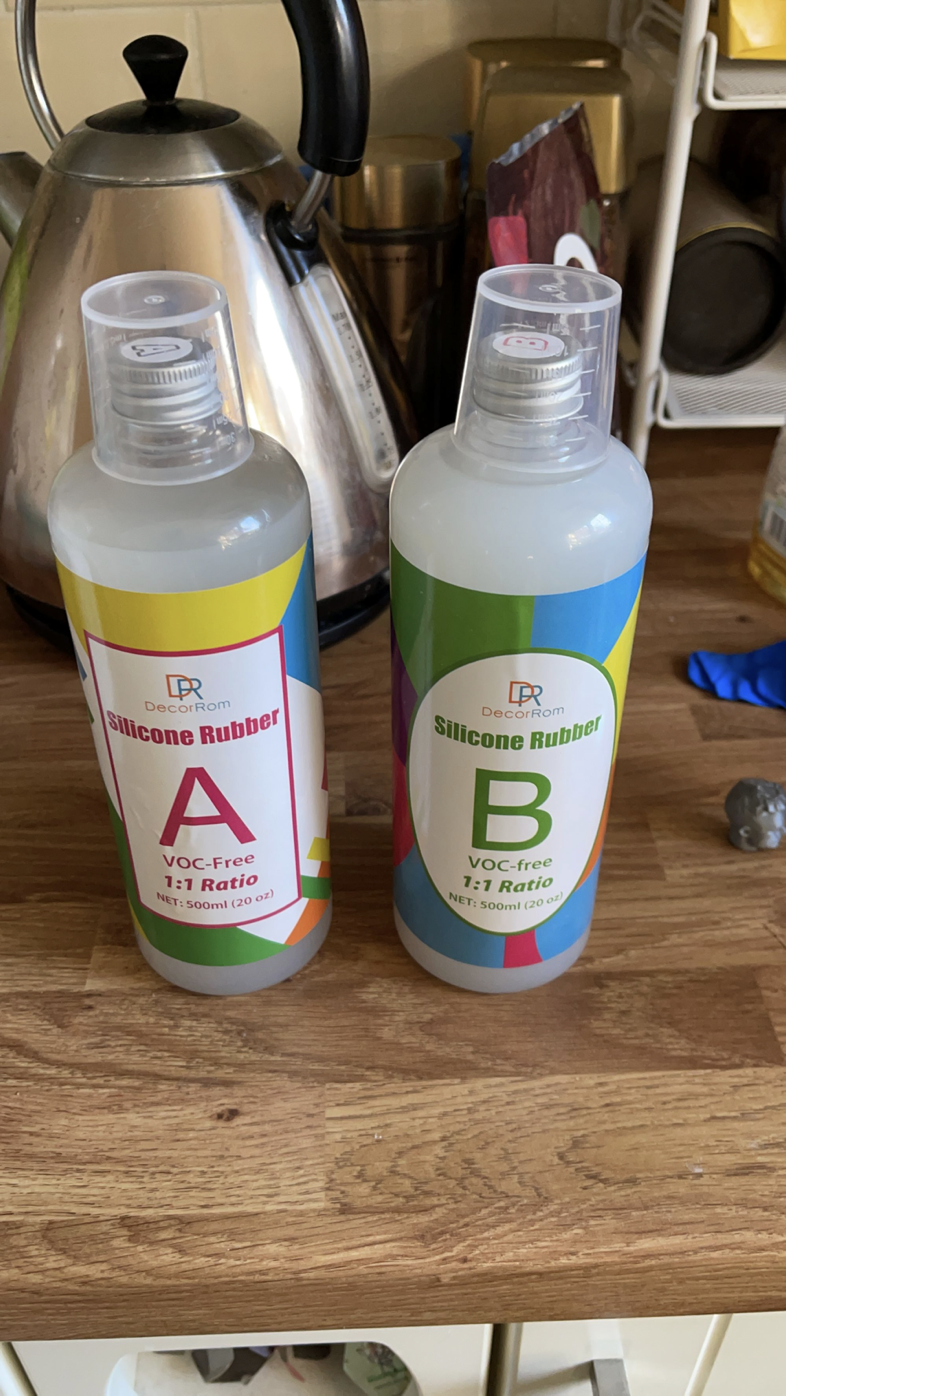
I used a silicone rubber mix to create an imprint of the head. You could just 3D print an inverse version to create this mold in plastic, but I wanted the mold to be food safe, so chose this method of casting the head in silicone.
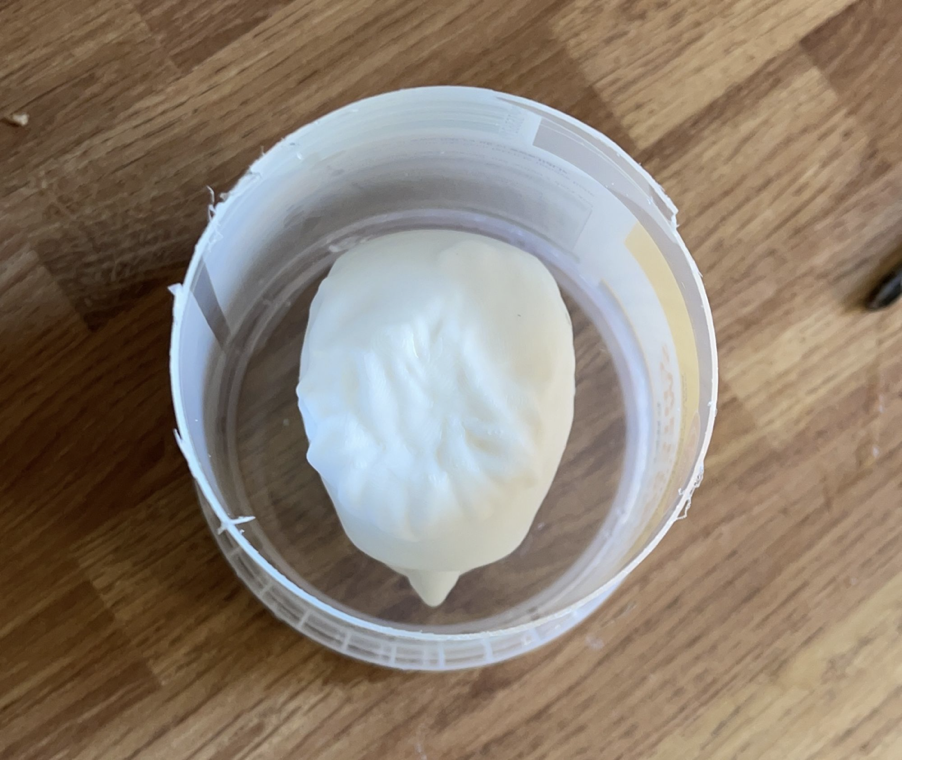
I prepped a discarded soup container and glued the head to the base, so the neck would be facing up in the mold. Then, simply mix the silicone together as instructed and pour over. Be sure to vibrate, bang, jiggle, and shake (gently) the container to remove as many bubbles as possible. Bubbles will always be your enemy at every stage of the process to get a good reproduction. You'll then need to leave this at least overnight to set. Getting a solid plastic head out is not easy, so you will have to carefully cut a slit down one side (I'd suggest back of the head).
Food!
Once the original form is extracted, you can put whatever you like in to set. Clay slip, chocolate, wax for candles, even water for funky ice heads. Be sure to retain the container to support any liquid content while it sets from pouring out of the seem you made... You can also use rubber bands to stop the mold from opening apart from the weight of the contents.
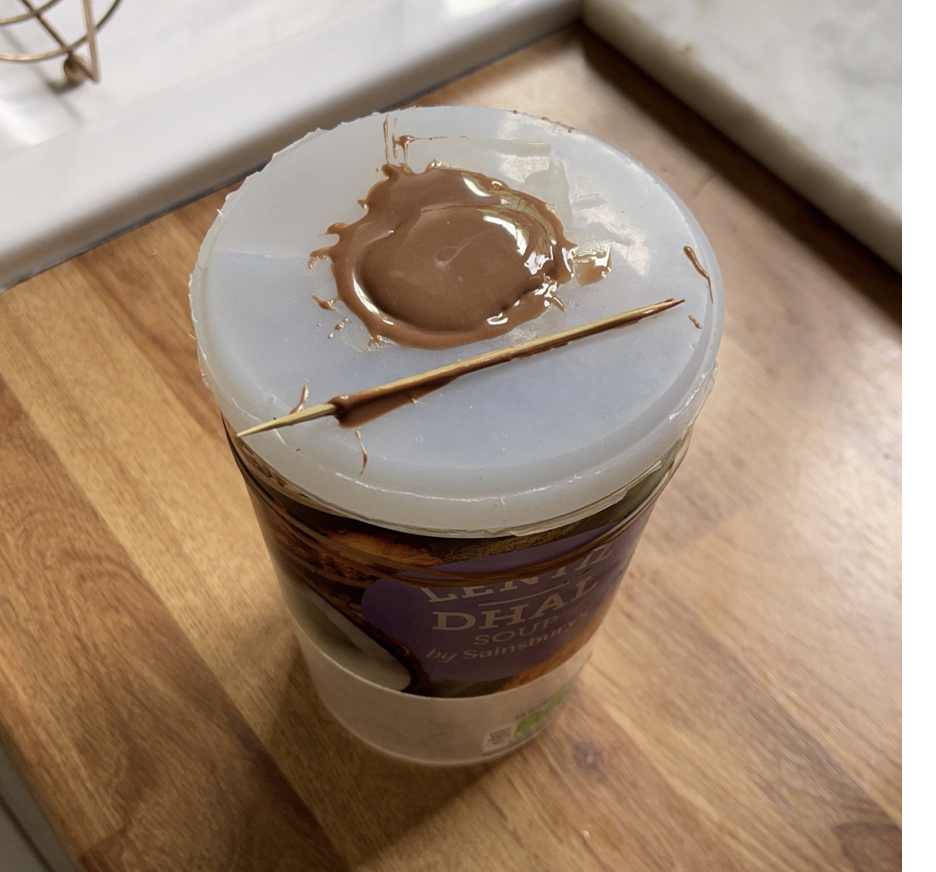
Use a toothpick to swirl the chocolate or liquid around and vibrate the container again to dislodge any bubbles. I've found bubbles love to form in the nose and ears, so try to poke your stick into those areas right to the surface. You don't want a chocolate Voldemort. If you want a shell instead of a solid head, simply let set for 20/30 mins and then pour the remaining molten contents out.
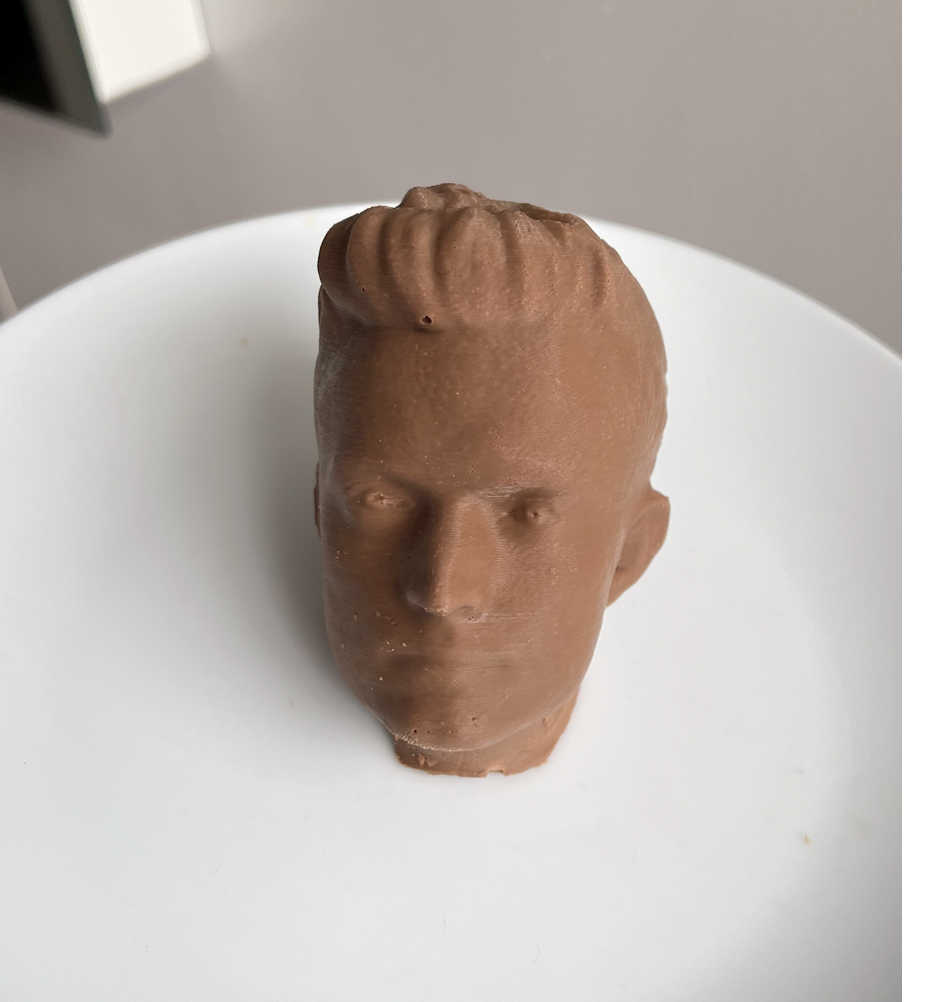
Unmold VERY carefully. Especially with chocolate, the heads can be very fragile, so be careful.
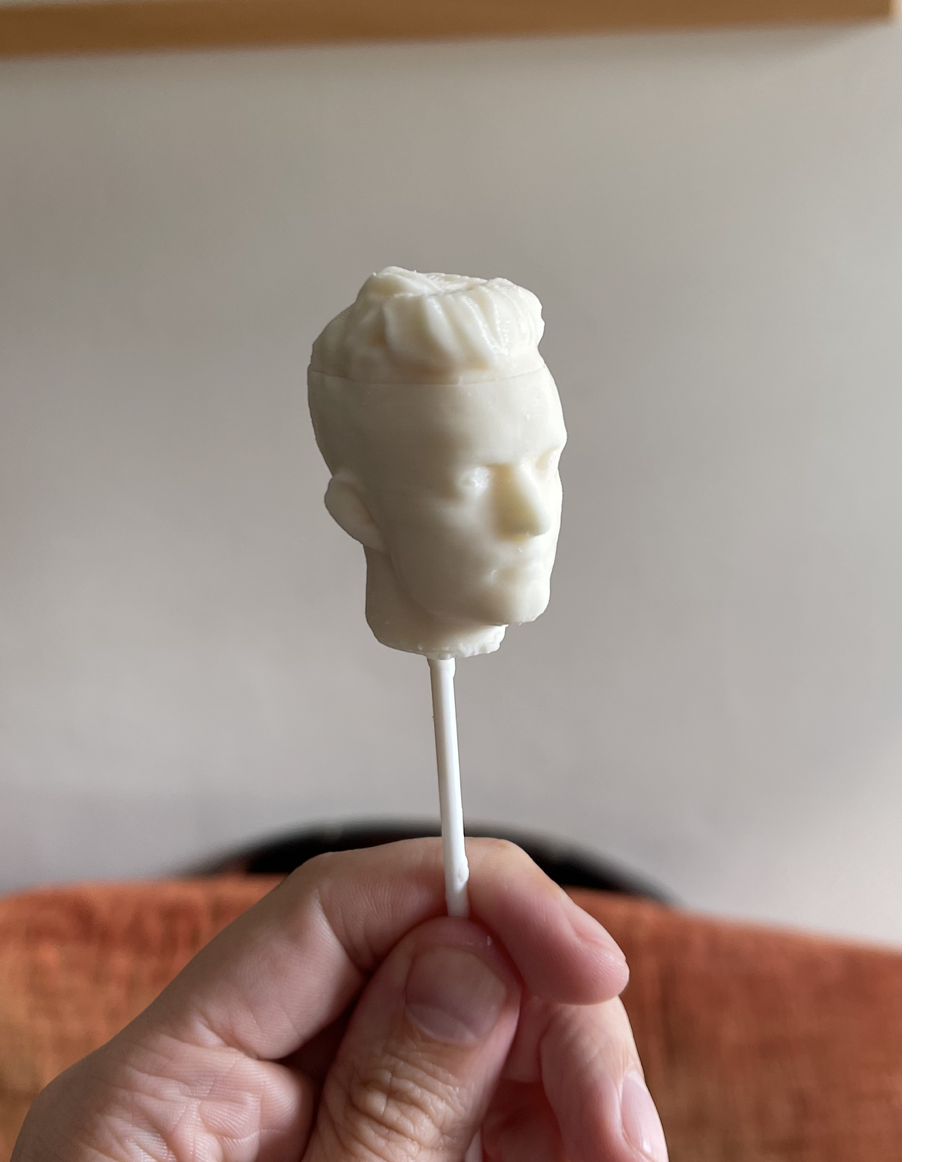
I also made smaller lollipop size heads for a smaller tasty treat. This time I used candy melts to avoid making lots of tempered chocolate. Candy melts are a great substitution if you're looking for a nice solid and stable head!